Create a bag and add orders
Prepare a new bag at your location, choose the correct final agency and build an accurate parcel list using search, selection or barcode scanning.
Overview
Prepare a new bag at your location, choose the correct final agency and build an accurate parcel list using search, selection or barcode scanning.
Understand the bag journey
A bag groups parcels travelling together. Its origin agency and final destination agency identify the overall journey; its current location tells you which team should handle it now. A transfer carries the closed bag to the next stop, which may be an intermediate hub rather than its final agency.
The sending agency prepares the contents. A hub can also prepare bags at its own location and forward received closed bags. The final receiving agency checks individual parcels and completes the bag. Company operators coordinate the locations available to their account; transporters carry assigned transfers. Available actions still depend on your permissions and the bag’s location.
Preparing means the contents are being assembled. Ready to Send means the bag is closed and prepared for movement. Assigned to Transfer means a transfer has been chosen; On the Road means that transfer has departed. Arrived means the bag was received at the next stop. Completed means final handling was recorded. Receiving a bag at a hub does not complete its journey.
Steps
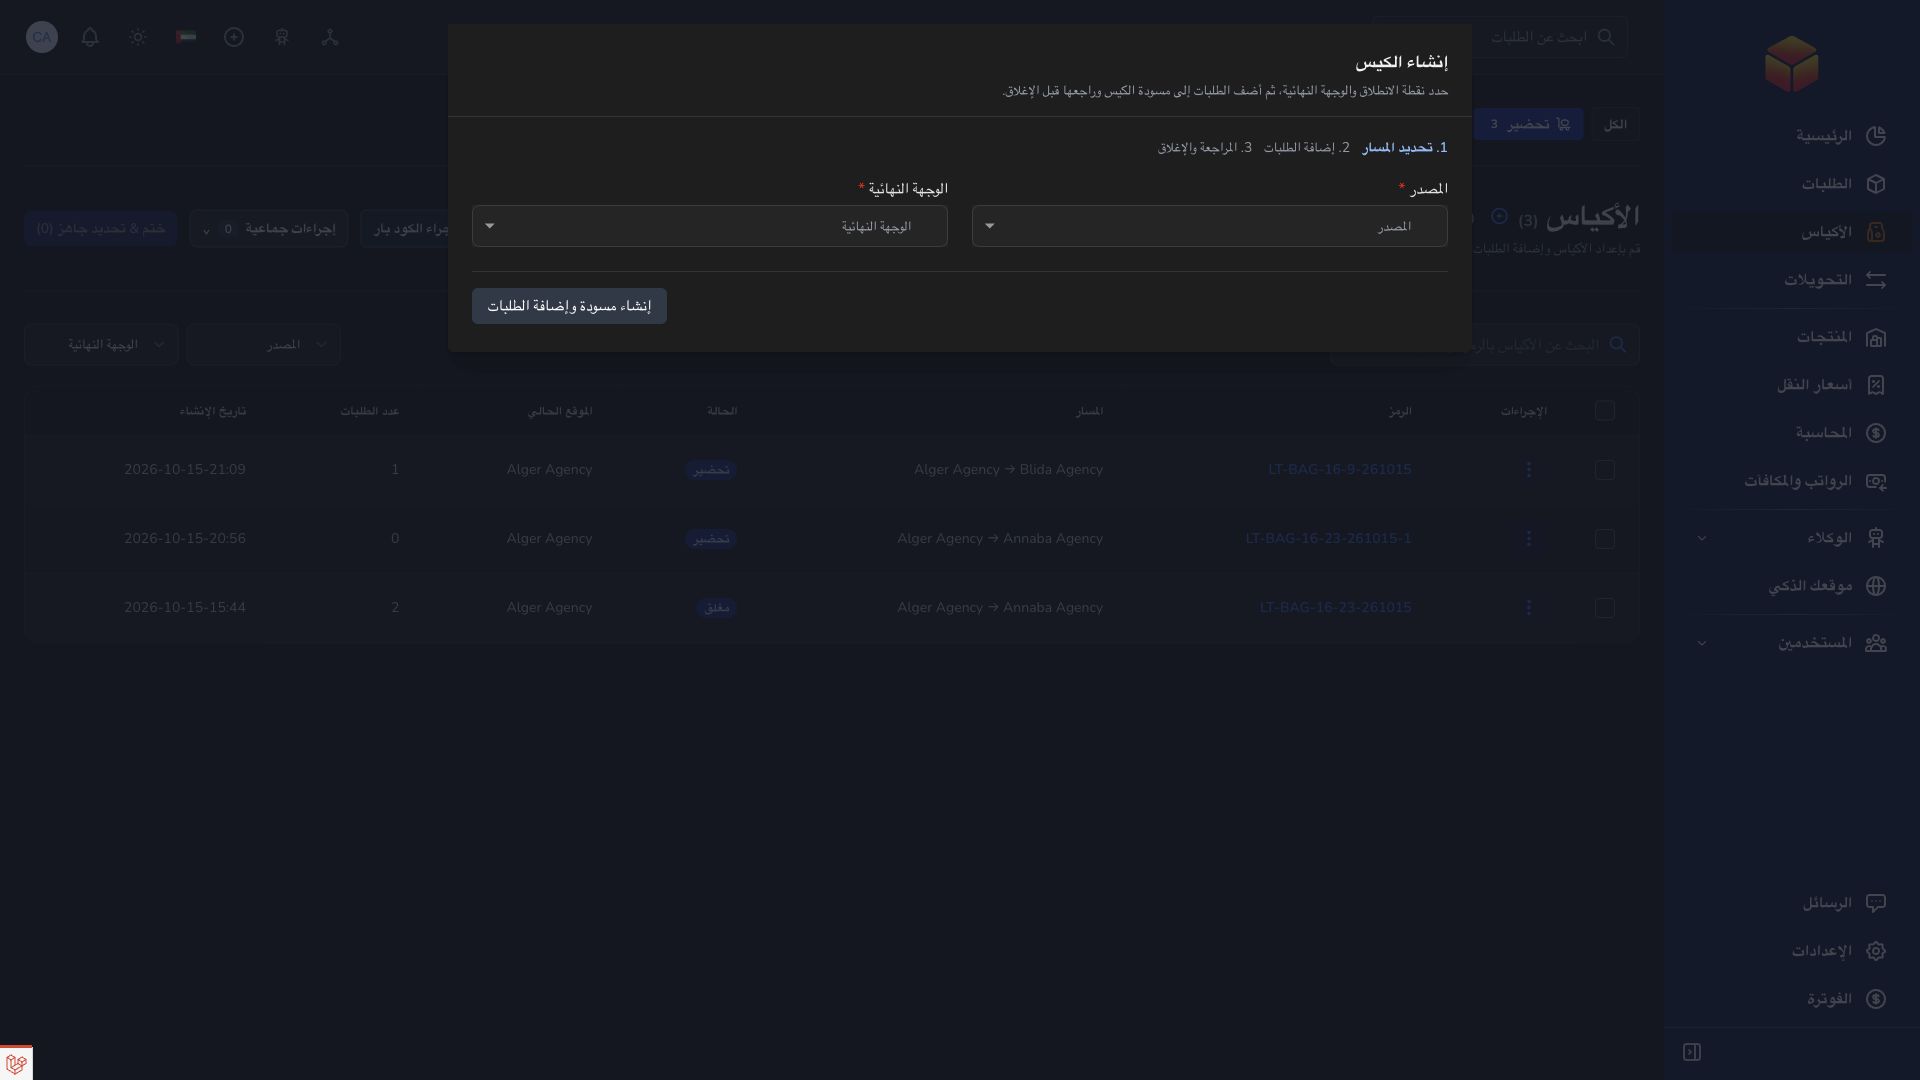
- Open Bags and choose the creation action if your account offers it. Identify the parcels physically available at your preparation location before starting.
- Check the origin agency and choose the final destination agency. An agency prepares from its own location; a hub preparing a bag also identifies the agencies for the overall journey while the bag remains physically at that hub.
- Save the form and open the new bag’s details. Check the route before adding parcels: changing the final destination is blocked once orders have been added.
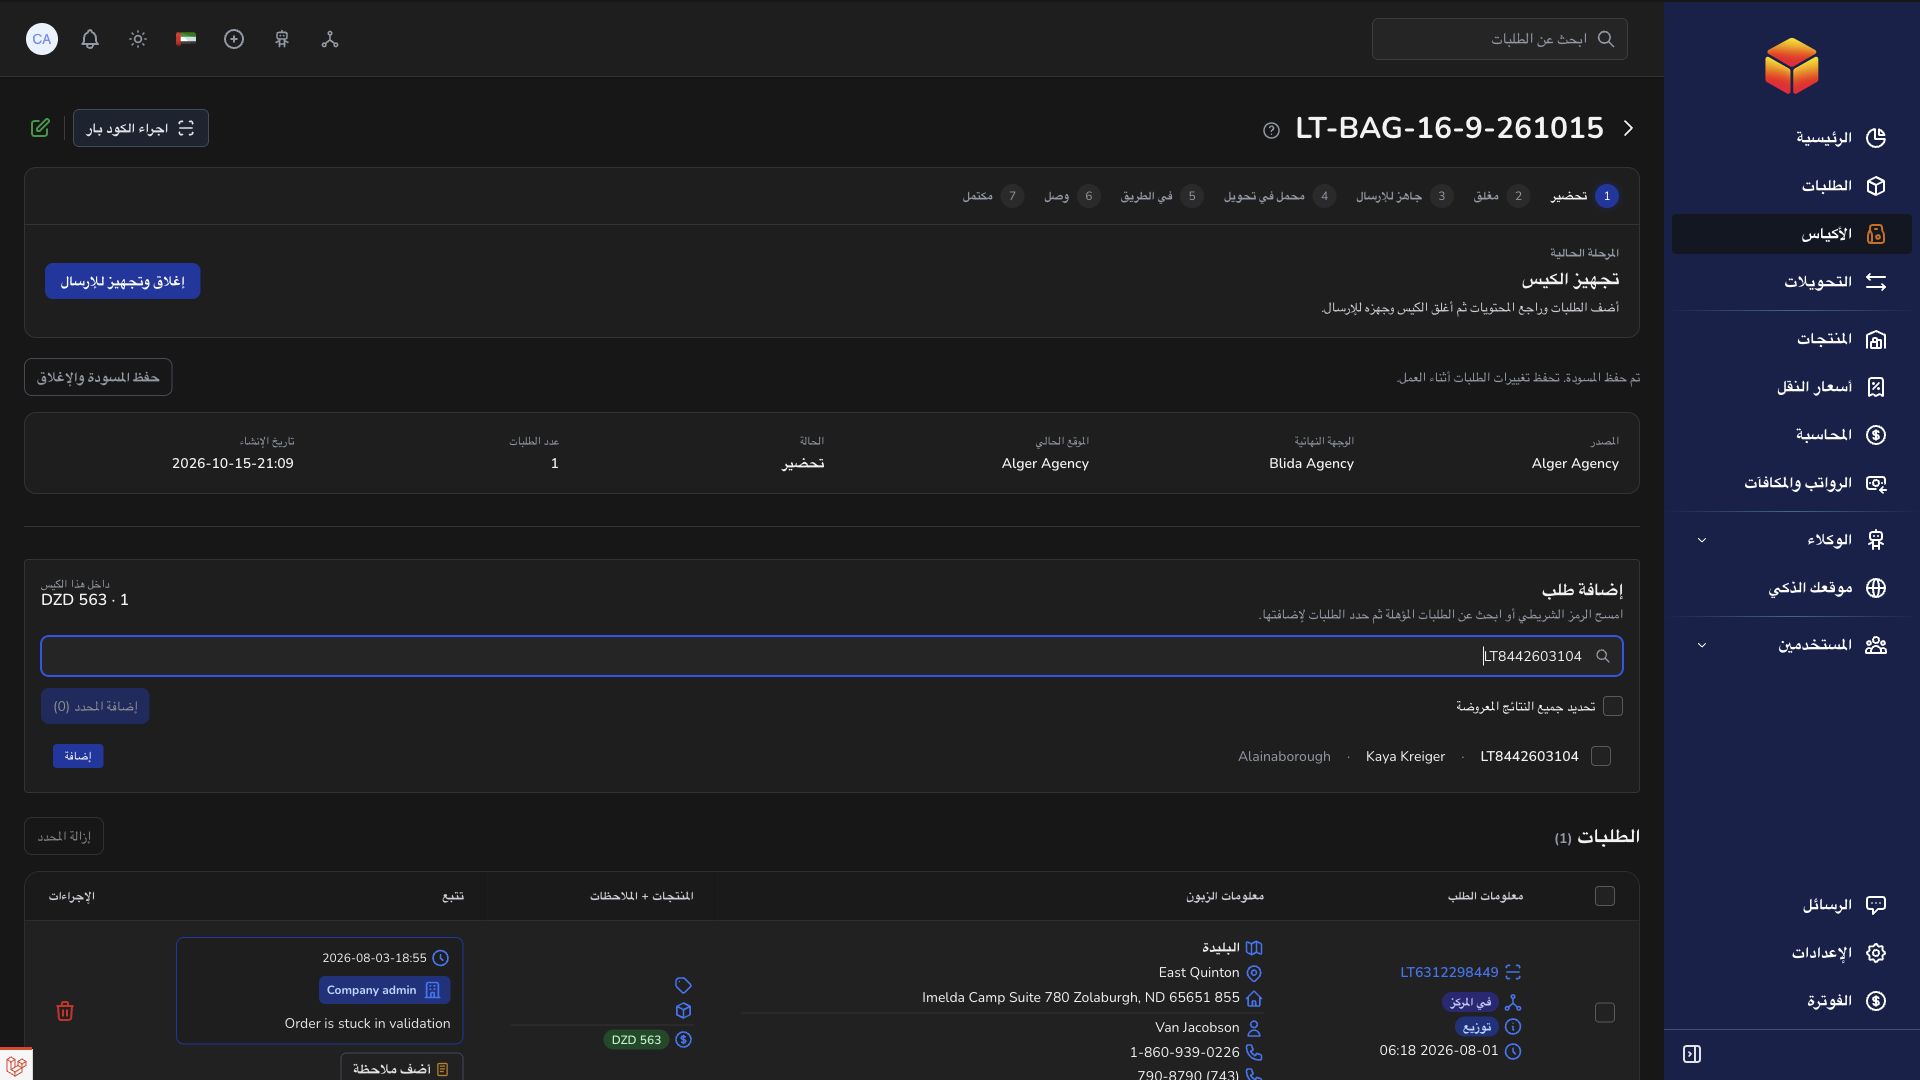
- Use Add orders and search with an order barcode, reference, customer name or city. Select the matching parcels and add them; use multiple selection where offered to add several together.
- For barcode work, choose Add Order before scanning. Match each scanned reference to a parcel you are actually placing in this bag. Read the feedback and check the list after each addition.
- If an addition is refused, check whether the parcel is already in another bag, at another location, belongs to a different destination or is at an unsuitable order stage. A search match still needs to pass these checks when added.
- Remove a wrongly selected parcel while the bag is still being prepared. Use the row or selected-order action, or choose Remove Order before scanning its barcode. Physically take the parcel out as well.
- Compare the final list and count with the parcels in front of you. Keep the bag in preparation until the route and every included parcel are correct; then continue with Seal and mark ready.
Which parcels can be included?
Parcels must be available at the bag’s preparation location, belong to the same company, match the final destination and be free from another current bag assignment. Ordinary outbound preparation accepts the relevant In Transit or In Hub stages; return movements use the relevant return-handling stages.
If a parcel appears in search but is rejected on addition, investigate the message instead of creating a duplicate order or putting the physical parcel into an unrecorded bag.
Use the scanner in the right mode
The same scan box can perform different actions. Check its selected mode before each batch: Add Order includes parcels; Remove Order takes them out of the manifest. Scanning a code is not always a lookup.
After a slow response or connection problem, inspect the contents before scanning again. The recorded list and the physical contents should agree before you close the bag.
Good to know
Contents can be added or removed only while the bag is in preparation. Correct a wrong destination before adding parcels and resolve any rejected additions before sealing.
Application links
Application links require the appropriate account access. The destination is selected for your signed-in role.